 Bundles
 Smart Cameras
 Video Keypad
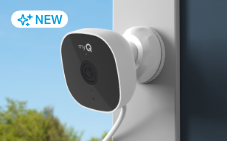
 Enterprise
 Fire Station
How to Install Security Cameras
How to Install Security Cameras: A Beginner’s Guide
So, you’ve decided to bolster your home security system with smart cameras. You’re one step closer to a safer and more protected home.
Yet you may be wondering—how do I install security cameras myself? If so, you’re in the right place.
The good news is that setting up cameras is quick and easy once you understand the basics, and the myQ team is here to help. Keep reading to learn how to install security cameras in and around your home, garage, and yard. We’ll also cover how to secure your home with additional smart security measures and answer common questions like, "Are home security systems worth it?"
How to Install Your MyQ Security Camera
Our smart security cameras combine video recording with intelligent features like motion detection, face recognition, 2-way audio, and more. We also offer three types of myQ security cameras: indoor, outdoor, and garage.
What Tools Do I Need?
No tools are required to set up your indoor and garage cameras. The indoor camera has a stable mount that sits flat, and the garage camera has a metallic base that can be mounted to any metallic surface.
When installing our outdoor security cameras, you’ll need the following:
- Ladder
- Philips Screwdriver
- Power Drill and Drill Bit (3/32" for pilot holes or 7/32" for wall anchors)
In addition, all smart cameras need a strong WiFi signal and Bluetooth to be connected to the myQ app.
Step-by-Step Guides
Ready to start installing? Here’s how to set up your myQ Smart Indoor Camera.
- Choose a flat surface, such as a tabletop or shelf.
- Remove the silicone protective tab on the mounting hinge and the protective lens cover film.
- Adjust the camera angle by turning the camera head to your desired viewing position.
For the Smart Garage Camera, you can follow the same steps, except you’ll attach the magnetic mount to a metallic surface (e.g., garage door opener, refrigerator, toolbox, shelf).
Here’s how to install security camera wiring for myQ outdoor cameras.
- Connect to myQ inside your home before setting up the camera outside (detailed instructions below).
- Choose an outdoor mounting location with a clear, wide field of view.
- Plug the camera into your outdoor outlet, ensuring it turns on and connects to WiFi.
- Install the mounting plate by drilling pilot holes, installing anchors (if needed), and securing the screws.
- Lock the camera into the mount by turning the base until you feel a click.
- Adjust the camera angle.
And just like that, your camera is ready to go.
Setting Up Your MyQ Security Camera in the myQ App
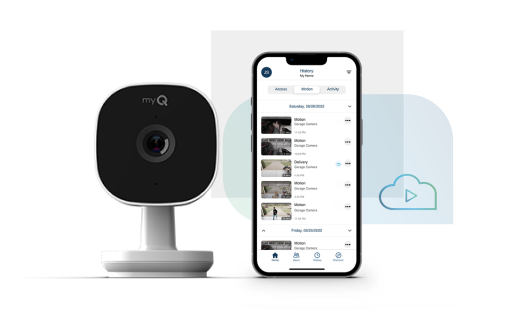
Monitor video footage anywhere, anytime, by connecting your security camera to the myQ app. The process is simple:
- Open the myQ app, click the plus icon at the bottom right of the home screen, and follow the prompts to connect a new camera.
- Plug in the included micro-USB power adapter and connect it to the camera to power it up.
- Wait for the LED light to turn solid green. This means it’s connected!
Then, open the myQ app to view the live video and adjust the camera angle as needed.
Still can’t connect? Don’t worry—you can troubleshoot common issues on our support page.
Is It Easy to Install myQ Security Cameras?
The myQ installation process couldn’t be more effortless. Our smart cameras are designed for a quick, hassle-free setup, making it easy to install them yourself at home with minimal preparation.
With every camera, you’ll enjoy:
- All necessary materials included (USB power cord, adapter, screws, etc.)
- Our free and user-friendly app
- Comprehensive installation guides (available in English, French, and Spanish)
Thanks to the intuitive setup process, you’ll be live-streaming footage in no time.
Optimizing Camera Placement for Maximum Security
Research shows that visible security systems, such as cameras and alarms, will deter potential burglars from entering your home. That’s why part of choosing the best locations for your indoor and outdoor cameras involves ensuring they’re well-seen by potential intruders. If you're unsure where to place security cameras, focus on key entry points, high-traffic areas, and spots with a clear, unobstructed view.
It’s also important to avoid blind spots and ensure clear footage. Don’t put cameras behind bulky objects, branches, bushes, or anything else that might block their view. Additionally, avoid pointing your outdoor security cameras into direct sunlight, as this can cause glare and damage the camera over time.
For indoor placement, we recommend:
- Entry points (doorways and hallways)
- High-traffic common areas (living room, kitchen)
- Corners with wide vantage points
When setting up outside, choose areas like:
- Front and back door
- Garage
- Driveway
- Sheds, gates, and other outdoor structures
After installation, consult your live stream footage to make any necessary adjustments to the camera angle and field of view.
Protect Your Home with MyQ Security Cameras
Now that you know how to install cameras at home, you’re ready to browse the wide variety of myQ smart security cameras and other products designed to safeguard your family, pets, and loved ones 24/7. With our video monitoring system, you’ll get real-time alerts sent right to your smartphone for total peace of mind—even when you’re far from home.
Explore all our smart home products, including garage controls and smart locks, today to get started.
Sources:
Consumer Affairs. Home security statistics 2025. https://www.consumeraffairs.com/homeowners/home-security-statistics.html.
CNET. The 6 Best Spots You Should Mount a Home Security Camera. https://www.cnet.com/home/security/best-places-to-install-security-cams-for-homeowners/.
